I have been blogging for more than a year. It is interesting for me to look back at old posts & see the difference in the quality of my pictures. For one, nearly the entire first year, I was using a little point & shoot camera. Now, I have a fancy pants camera {which I love}. Secondly, I started using Photoshop more & more.
I learned how to use Photoshop when I was in Design school. But, with the enormous quantity of photos I publish here, Actions make my life a whole lot easier.
For this demonstration, I will be using The Pioneer Woman's Action Sets One & Two. I love hers, because they produce amazing results & they're free!! MCP & IttyBitty have awesome ones for sale...along with many others available online, if you look around for them.
Under each photo, the specific action I used will be in brackets.

{Original}
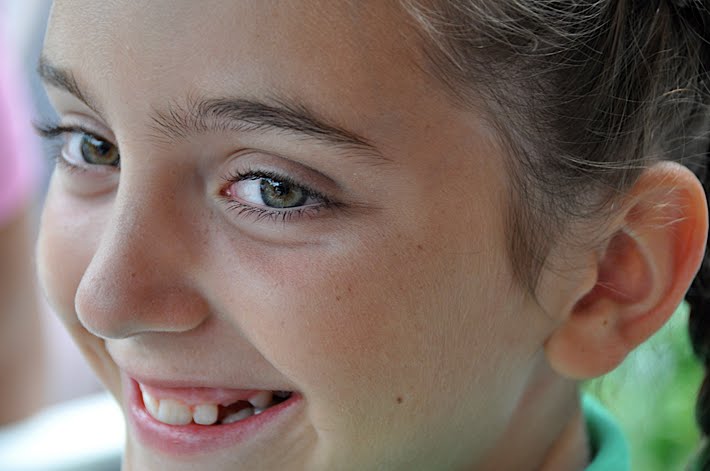
I took this shot over the weekend. It's a great picture on it's own. But, when I see a picture like this, I see the potential to make it even better. The subject is beautiful, the lighting is natural & it's in focus.


left {Slight Lighten}
Many of the actions I use drastically adjust the contrast. So, I usually begin by lightening the image a bit, to avoid the end result being too dark.
right {Define & Sharpen}
After I lighten, I run this action. It does exactly what the title describes. It sharpens & adds enough contrast to make it more crisp.


left {Boost}
Next, I ran the Boost action. This makes the colors & contrast really pop. It doesn't always work for every photo. At times, it can be a bit too much. But, here I think it really works.
right {Bring On The Eyes}
All of the adjustments I made really darkened her eyes...one of the most striking things about the photo. So, I ran this action to lighten them back up. After clicking on the action, you use the brush tool to lighten the eyes. It runs at 100% opacity & depending on the photo, you may need to adjust the opacity a bit to suit your picture.


Here is a before & after.
You can see the dramatic difference & how you can take an already great picture & make it so much better!
The picture on the right is the finished photo. But, you can take it one step further by adding any one of the following artistic actions.
They were all added to the finished photo, not the original.

{Sepia}


left {PW's B&W}, right {Heartland}


left {Fresh & Colorful}, right {Colorized}

{B&W Beauty}

{Seventies}

A few more...

before & afters.
*Note* The gorgeous subjects in these photos are Callie & Hannah. The daughters of my cousin, Patty.


1 comments:
Thanks for taking the time to demonstrate the effects of these Actions. All are incredibly helpful!
Post a Comment